Difference between revisions of "DragonA400 Tips & Hints"
(→X-Drive Belt Tension) |
|||
| Line 9: | Line 9: | ||
Belt Tension Gauge: https://www.mcmaster.com/#5913t1/=1aqmfcw | Belt Tension Gauge: https://www.mcmaster.com/#5913t1/=1aqmfcw | ||
| + | |||
| + | '''* Our belts are set to within 100-120 lbs of tension according to the belt's specs.''' | ||
==Carbon Grounding Brush Replacement== | ==Carbon Grounding Brush Replacement== | ||
Revision as of 10:12, 18 December 2017
This page will discuss tips and hints that we've found useful for DragonA400 users who experience various difficulties with their machine and/or components.
Contents
X-Drive Belt Tension
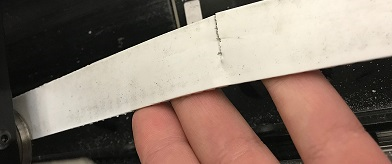
The tension of your X-drive belt is very important. If it's too loose, the belt's teeth will skip on the pulley that drives it. If it's too tight, the X-motor could bind up around certain segments of the rail or the belt could tear or snap completely.
It is because of these undesirable affects that we instruct you to tension your belt according to the distance written on the clamp block near the rear of the machine as per the Dragon A400 Assembly Manual. If you have issues with your belt's tension as described above, we suggest investing in a belt tension gauge. They are fairly inexpensive, but can prolong the life of your belt and keep your machine in pristine working order for much longer.
Belt Tension Gauge: https://www.mcmaster.com/#5913t1/=1aqmfcw
* Our belts are set to within 100-120 lbs of tension according to the belt's specs.
Carbon Grounding Brush Replacement
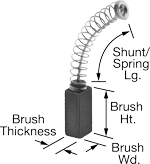
If you've put a significant amount of hours on the Dragon Machine, there may come a time when the carbon grounding brushes will need replacing. These can be purchased at the link available here. (Part ID# 65705K39)
https://www.mcmaster.com/#65705K39
Chuck Spindle Cleanup
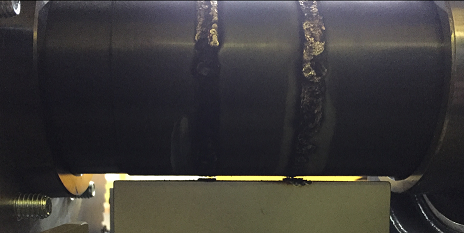
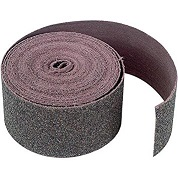
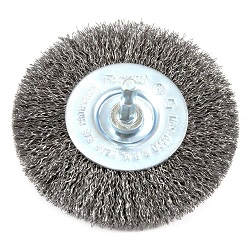
When Carbon Brushes go bad, or are no longer usable causing your plasma torch to misfire, or not continue to fire during operations, most likely the torch is arcing out and will be causing significant scarring on your chuck spindle inside the chuck housing. In this case, we suggest immediately replacing your Carbon Brushes (See above), but also cleaning off any of the scarring on the chuck spindle with emery cloth or a wire brush wheel.
Engraver Maintenance
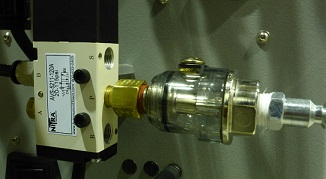
To ensure that your engraver tip lasts as long as possible, we suggest that you keep pneumatic oil in your machine's airline oiler at all times. This may only need to be filled every 3-6 months depending on usage. If you're using your engraver on every job (i.e. for bend marks, shift marks, artwork on tubes, etc.), re-fill the oiler reservoir every 10-12 working hours.
Get pneumatic air oil like this: https://www.mscdirect.com/product/details/00090274
Engraver Replacement
Sometimes, regardless of preventative maintenance measures taken, the engraver tip or entire unit will be in need of replacement. In this case, this engraver can be purchased at the link available here.
https://www.mscdirect.com/product/details/92370220
Plasma Gas Selection
- Select the Plasma Gas Selection Information link for detailed information showing what advantages and disadvantages there are to working with gasses in your plasma torch.
Air Filter System
Do I need a separate air filter for my air plasma system? The cut quality, performance, and consumable life of any air plasma system are directly impacted by the quality of the air going into it. Not only is it important to make sure you have enough air; you also need to make sure the air you have is clean and dry. This is especially important in areas with humid weather, as this excess moisture will easily make its way into your air compressor tank and air lines. If this should be the case, we suggest draining your tank at least once a day or better yet, installing an automatic drain system. In addition, you may want to add a second filter (in addition to the filter already inside your plasma unit) at least 20 feet downstream of the compressor, to help collect some of this moisture. If you plan to use your system a lot – in a production environment, for example – or live in an area with extreme humidity, then you may need to use a refrigerated air dryer or desiccant filter system to remove moisture.
Marker Options
Typically, our shop uses metallic or black Sharpie style markers for calibration purposes and benchmarks. We've also heard from customers that they like to use Milwaukee Inkzall style markers because the marks are clear and don't tend to wipe off as easy. The main reason for the Inkzall marker is to mark the material even in the presence of oil, or grease. The Inkzall markers will also write over rusty tubing easier.
IMPORTANT: If you use the Milwaukee Inkzall marker, you will have to cut/shave away the protruding section on the side so that it can fit into the machine's marker holder.
Purchase Milwaukee Inkzall Markers: https://www.amazon.com/Milwaukee-48-22-3104-Inkzall-Marker-4-Pack/dp/B00J2N2JZK/ref=sr_1_1?ie=UTF8&qid=1510352447&sr=8-1&keywords=inkzall+markers&dpID=51mUvxgf0xL&preST=_SY300_QL70_&dpSrc=srch
Marker Revival
Sometimes the markers will dry out because they are marking close to a cut zone where the tubing is still hot from the plasma. This can dry out your markers in record time. To bring your dried out marker back to life, dip the tip in some rubbing alcohol and it will work as good as new. It is also smart to make sure that your tubing is wiped down before running the stick to make sure that the grease doesn't inhibit the marker's ability to show up well on the surface.
