Difference between revisions of "Dragon Tips & Hints"
(→Frayed or Broken A-Axis Cable) |
|||
| Line 29: | Line 29: | ||
[[File:Pdf2.png|link=http://www.bendtechdragon.com/files/z_axis_cable_replacement_walkthrough.pdf]] '''[http://www.bendtechdragon.com/files/z_axis_cable_replacement_walkthrough.pdf Z-Axis Replacement Cable]''' | [[File:Pdf2.png|link=http://www.bendtechdragon.com/files/z_axis_cable_replacement_walkthrough.pdf]] '''[http://www.bendtechdragon.com/files/z_axis_cable_replacement_walkthrough.pdf Z-Axis Replacement Cable]''' | ||
| − | ==Frayed or Broken | + | ==Frayed or Broken A-Axis Cable== |
| − | - In the event of a fraying or broken | + | - In the event of a fraying or broken a-axis chain/cable, the part must be replaced. This will require a careful and attentive read through of the instructions contained in the link below. |
Revision as of 06:11, 31 May 2016
This page will discuss tips and hints that we've found useful for Dragon users who experience various difficulties with their machine and/or components.
Contents
Marker Slippage
- Sometimes the markers placed in the marker holder slip freely and fall out of the holder. We recommend a black or silver Sharpie for this. If the Sharpie still slips out of its holder, wrap the marker in tape (we use duct tape, but any tape will do) to ensure that it is held securely in the marker holder.
Rail Maintenance
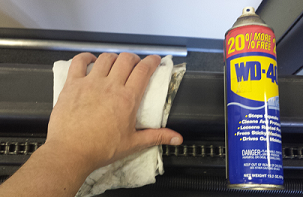
- Your Bend-Tech Dragon machine will require maintenance in is lifetime. The following is a small routine maintenance process that should be completed about once per week, or if you notice build up of grime or dirt on either the main rail or on the roller bearings of the chuck trolly. This process should take less than 10 minutes to complete.
Step 1) Send the chuck to the middle of the machine. (Either jog the machine to this location or manually move the chuck while the machine is off.)
Step 2) Wipe down the entire reachable surface of the main rail. The section under the trolly will not be accessible during this step.
Step 3) Begin the homing sequence. (Click the "Ref All Home" button in your Mach software)
Step 4) During the homing sequence for the X Axis, carefully wipe off the roller bearings on the chuck trolly as they are rotating at this slow speed from the homing sequence. (They tend to accumulate grime and dirt during the operation of the machine.)
Step 5) Wipe down the section of the main rail that was covered by the trolly before the homing sequence.
- This will provide a clean working environment for the chuck trolly to roll on and will increase the life of the trolly bearings. To ensure that your rail/beam remains in pristine condition and operates up to our standards, make sure to follow through with this process as needed.
Frayed or Broken Z-Axis Cable
- In the event of a fraying or broken z-axis chain/cable, the part must be replaced. This will require a careful and attentive read through of the instructions contained in the link below.
Frayed or Broken A-Axis Cable
- In the event of a fraying or broken a-axis chain/cable, the part must be replaced. This will require a careful and attentive read through of the instructions contained in the link below.

