Assembly Tutorial II
"UNDER CONSTRUCTION: THANK YOU FOR YOUR PATIENCE"
Contents
Things To Know
- This tutorial is designed to walk the user through creating a part in the Assembly design interface. As you go through this tutorial, later procedures will assume that you understand all earlier procedures. Because of this, it is very important that you carefully step through this guide, understanding everything along the way and following all steps in order.
- A few key items need to be addressed before starting the step-by-step instructions of this tutorial. It is very important for Bend-Tech users to completely understand these items:
- 1) PickPoints
- PICKPOINTS ARE USED FOR EVERYTHING. The Assembly part of the software is largely run in full 3D. Because a computer screen is only 2D, there is an unlimited amount of depth behind and in front of the cursor. A PickPoint is a point in 3D space that can be used for creating, editing, and placing parts in Assembly design. PickPoints can be placed in a 2D environment by having their depth manually entered in the appropriate value fields.
- There are 2 types of PickPoints; Those automatically created by the part by default (various colors) and user-defined points (green). In addition, the initial (0,0,0) point is an automatic point that resides at the center of the Tri-Star. The Tri-Star is our directional definition locator.
- 2) Center Line & Apex
-
- Center Line: In the Assembly design environment we are working exclusively with the center-line of a part, as compared to the inside or outside.
- Apex: Most bend locations are created in Assembly design with the Apex. Our definition of apex is the intersection of the straight tubes as if there wasn’t a radius.
- This is demonstrated in the picture below.

- 3) Locational Orientation
-
- Designing seems to work the best if users imagine they are standing behind the vehicle at a 45 degree angle. This way left is left and right is right. Take a minute and examine the Tri-Star to get your orientation.
- Notice how the truck in the picture is setup with the same orientation.


- 4) Defining Parts
-
- It is possible to create parts in the template and custom part interfaces, however, starting out this way tends to get confusing for new users of the software. It appears that there is a higher level of success with customers who start out designing parts directly in the assembly interface.
Assembly Tutorial
- In this tutorial we will be building the assembly as shown in the pictures below:


Template Designer
- This tutorial will use 2 template parts from the Template Designer that will be transferred into the Assembly project.
- Start out by selecting the File -> New -> Tube -> Template from the main pull-down menu at the top of the screen. Alternatively, you may also select the New Tube icon in the main toolbar, then click the Template icon.


Creating the first Part:
- Notice the first part being made in this tutorial is the most complicated. It is a Double Bevel Hoop with 4 bends. The dimensions for this part are displayed in the picture below.


- To begin on the first part, choose the orange 4 under the "Number of Bends" header.

- From there, select the "Double Bevel Hoop" option. Leave the dimension button at Center Line and select the "OK"
 button.


- Then select the die and material used in Assembly Tutorial.
- Select the "2.0" Die and the "1.0" Material.

- Then, to create the part to our specifications, Type in the values as they appear below in the picture.

Once the part is completed, it will need to be transferred out into the Assembly interface.
Transferring the Part to Assembly

- Select the "Transfer"
 button from the icon menu bar and click the "New Assembly" option from the list.
- Then, when the "Prepare for Assembly" window appears, start by selecting the "Rotate"
 button to stand the part up.

- Then, click the "Axis"
 button and select the "Red" axis to designate it as the axis that the part will rotate around.

- Now, click the "Rotate" button again to set the part along the "Green" axis.
- To change the Coupler location, start by selecting the "Lines (Two-Points)" option underneath the "Create Points" section.
- To create a new point, select the "Set Reference" button and click on the bottom, yellow Pickpoint of the LEFT leg. Then, select the bottom, yellow Pickpoint of the RIGHT leg. This will draw a line between the two points.
- From there, select the "Split in Half"
 button and click "Apply"
  to finish placing the point directly in between the two legs.
- Then, select the "Change Coupler"
 button and click on the point we've just created.

- Now, with the coupler set, close the window by selecting the "OK" button.
- (NOTE) When the window appears asking Do you wish to add this part directly into the assembly design?, just select the "No" button. For our purposes, we would like to place the part personally.
Assembly Designer
Creating Pickpoints

- In the Assembly Designer, select the Tri-star as the anchor point for our new part.
- From there, we're going to make an additional point so that we can attach another template part to it later.
- So, go to the Pickpoints tab on the left of the display area and type "36" into the light blue "Back" value field.
- Then, select the Tri-star in the display area as a reference and click the "Apply" button to finish.

Nudge Bending

- Go to the "Edit" tab and the "Move" sub-tab to find the "Nudge Bend" feature.
- Next, type "3" into the "Amount"
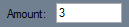 value field and select the "Nudge Bend"
  button.

- Then, select the top left bend on our part and select the pink "B"
 button in the "Move Bend" section. This will move the bend 3 inches into the back field.
- Now, do the same thing to the top right bend on the part to make the part symmetrical with this added rotation: Select the bend, then select the "Nudge Bend" button and click the "B" button.
- The part should appear like the picture below when you rotate it to a side view.

"This part is now complete. Prepare to make another Template by clicking on the Tube Icon on the icon menu bar and selecting the Template ![]() Icon."
Icon."