CAD to CAM Part Transfer

- While transferring any design from Bend-Tech CAD to Dragon CAM, please follow the process below.
1. First, make sure that the parts you'd like to transfer are completed and selected in the correct manner.
- From a single part designer: (i.e. Template, Custom Part, Custom 3D Part, Harpoon 3D, Sketch 2D, Sketch 3D, XYZ Part, Reverse Design.)
Simply make sure that your part was designed correctly and then click on the Transfer button at the top of screen and select the Dragon CAM option. There is no need to specifically select a part this way because there is only one. Assemblies are an exception because you must differentiate between which tubes you'd like to transfer.
- From Assembly:
If you'd like a single part transferred from Assembly to Dragon CAM, you must first be in the Parts tab, then you will select the part from the list, click on the Transfer button at the top of screen and select the Dragon CAM option.
If you'd like the entire Assembly transferred to Dragon CAM, you must be anywhere in Assembly Except the Parts tab, then you will click on the Transfer button at the top of screen and select the Dragon CAM option.
- In any case, after selecting the Dragon CAM option from the Transfer menu, the Dragon CAM software will open and a window will appear prompting you to apply a material available from Dragon and to designate which designer you would like to transfer these parts to.

2. Select material and destination for the part(s).
- First, click on the Material for Imported Parts
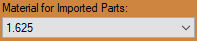 drop down menu and select the material that will be applied for the parts shown in the list. Note: If there is no matching material in the Dragon CAM software, you will be given the option to choose from any material that is available. If a material with a different OD is selected, the end cuts will be removed from the parts.
- Next, simply select the destination that the part(s) will be sent to.
Designer: Select the Designer ![]() button to send the part(s) to Dragon's Custom Design interface. If there are multiple parts, then each part will open in its own respective window. See more on the Dragon Design interface Here.
button to send the part(s) to Dragon's Custom Design interface. If there are multiple parts, then each part will open in its own respective window. See more on the Dragon Design interface Here.
New Nest: Select the New Nest ![]() button to send the part(s) to a new file in Dragon's Nesting interface. Any and all parts will appear in the nesting project under the Parts tab. They can then be added to a stock length of tube and sent to the Dragon machine for fabrication. See more on the Dragon Nesting interface Here.
button to send the part(s) to a new file in Dragon's Nesting interface. Any and all parts will appear in the nesting project under the Parts tab. They can then be added to a stock length of tube and sent to the Dragon machine for fabrication. See more on the Dragon Nesting interface Here.
Existing Nest: Select the Existing Nest ![]() button to send the part(s) to an existing Dragon Nesting file. The nesting file must be open in Dragon CAM in order to use this as an option. Any and all parts will appear in the nesting project under the Parts tab. They can then be added to a stock length of tube and sent to the Dragon machine for fabrication. See more on the Dragon Nesting interface Here.
button to send the part(s) to an existing Dragon Nesting file. The nesting file must be open in Dragon CAM in order to use this as an option. Any and all parts will appear in the nesting project under the Parts tab. They can then be added to a stock length of tube and sent to the Dragon machine for fabrication. See more on the Dragon Nesting interface Here.
Skip These Parts: Select the Skip These Parts ![]() button to remove the selected parts from the list and close the transfer window.
button to remove the selected parts from the list and close the transfer window.