Difference between revisions of "Mach 3 and ESS Install"
| (5 intermediate revisions by the same user not shown) | |||
| Line 1: | Line 1: | ||
'''"Mach 3 and the Ethernet Smooth Stepper (ESS) are necessary installs for users who operate our Bend-Tech Dragon software along with our Dragon Machine."''' | '''"Mach 3 and the Ethernet Smooth Stepper (ESS) are necessary installs for users who operate our Bend-Tech Dragon software along with our Dragon Machine."''' | ||
| − | '''"Carefully look through the steps below to complete these important installations | + | '''"Carefully look through the steps below to complete these important installations."''' |
| + | |||
| + | ==Step 1== | ||
[[File:Mach1.png|right]] | [[File:Mach1.png|right]] | ||
* Close all running programs and click the NEXT button. | * Close all running programs and click the NEXT button. | ||
| + | |||
| + | |||
| + | |||
| + | |||
| + | |||
| + | |||
| + | |||
| + | |||
| + | |||
| + | |||
| + | |||
| + | |||
| + | |||
| + | |||
| + | |||
| + | |||
| + | |||
| + | |||
| + | |||
| + | |||
| + | |||
| + | |||
| + | |||
| + | |||
| + | ==Step 2== | ||
[[File:Mach2.png|right]] | [[File:Mach2.png|right]] | ||
* Select the option to "agree to the terms of this license agreement" and click the NEXT button. | * Select the option to "agree to the terms of this license agreement" and click the NEXT button. | ||
| + | |||
| + | |||
| + | |||
| + | |||
| + | |||
| + | |||
| + | |||
| + | |||
| + | |||
| + | |||
| + | |||
| + | |||
| + | |||
| + | |||
| + | |||
| + | |||
| + | |||
| + | |||
| + | |||
| + | |||
| + | |||
| + | |||
| + | |||
| + | |||
| + | ==Step 3== | ||
[[File:Mach3.png|right]] | [[File:Mach3.png|right]] | ||
| + | * Leave the file location folder as it is and click the NEXT button. | ||
| + | |||
| + | |||
| + | |||
| + | |||
| + | |||
| + | |||
| + | |||
| + | |||
| + | |||
| + | |||
| + | |||
| + | |||
| + | |||
| + | |||
| + | |||
| + | |||
| + | |||
| + | |||
| + | |||
| + | |||
| + | |||
| + | |||
| + | |||
| + | |||
| + | ==Step 4== | ||
[[File:Mach4.png|right]] | [[File:Mach4.png|right]] | ||
| + | * Uncheck the '''Parallel Port Driver, Wizards, and LazyCam''' checkboxes and click the NEXT button. | ||
| + | |||
| + | |||
| + | |||
| + | |||
| + | |||
| + | |||
| + | |||
| + | |||
| + | |||
| + | |||
| + | |||
| + | |||
| + | |||
| + | |||
| + | |||
| + | |||
| + | |||
| + | |||
| + | |||
| + | |||
| + | |||
| + | |||
| + | |||
| + | |||
| + | ==Step 5== | ||
[[File:Mach5.png|right]] | [[File:Mach5.png|right]] | ||
| + | * Since we are sending users a specified Dragon profile, simply click the NEXT button. | ||
| + | |||
| + | |||
| + | |||
| + | |||
| + | |||
| + | |||
| + | |||
| + | |||
| + | |||
| + | |||
| + | |||
| + | |||
| + | |||
| + | |||
| + | |||
| + | |||
| + | |||
| + | |||
| + | |||
| + | |||
| + | |||
| + | |||
| + | |||
| + | |||
| + | ==Step 6== | ||
[[File:Mach6.png|right]] | [[File:Mach6.png|right]] | ||
| + | * Click the NEXT button. | ||
| + | |||
| + | |||
| + | |||
| + | |||
| + | |||
| + | |||
| + | |||
| + | |||
| + | |||
| + | |||
| + | |||
| + | |||
| + | |||
| + | |||
| + | |||
| + | |||
| + | |||
| + | |||
| + | |||
| + | |||
| + | |||
| + | |||
| + | |||
| + | |||
| + | ==Step 7== | ||
[[File:Mach7.png|right]] | [[File:Mach7.png|right]] | ||
| + | * Wait for the program to install completely. | ||
| + | |||
| + | |||
| + | |||
| + | |||
| + | |||
| + | |||
| + | |||
| + | |||
| + | |||
| + | |||
| + | |||
| + | |||
| + | |||
| + | |||
| + | |||
| + | |||
| + | |||
| + | |||
| + | |||
| + | |||
| + | |||
| + | |||
| + | |||
| + | |||
| + | ==Step 8== | ||
[[File:Mach8.png|right]] | [[File:Mach8.png|right]] | ||
| + | * Click the FINISH button. | ||
| + | |||
| + | |||
| + | |||
| + | |||
| + | |||
| + | |||
| + | |||
| + | |||
| + | |||
| + | |||
| + | |||
| + | |||
| + | |||
| + | |||
| + | |||
| + | |||
| + | |||
| + | |||
| + | |||
| + | |||
| + | |||
| + | |||
| + | |||
| + | |||
| + | |||
| + | ==Step 9== | ||
[[File:Mach9.png|right]] | [[File:Mach9.png|right]] | ||
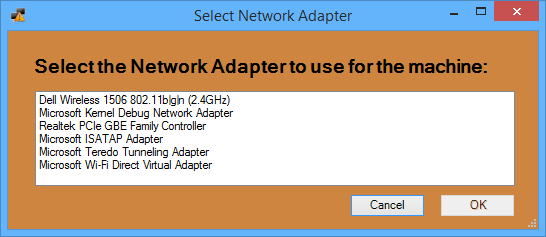
| + | * The Select Network Adapter window will appear. | ||
| + | |||
| + | * Select your ethernet adapter from the list (There is a very high probability that this is going to be the Realtek PCIe GBE Family Adapter). | ||
| + | |||
| + | * If you are unsure about your particular adapter, contact us at our office 651-257-8715 and we will help you determine this. | ||
| + | |||
| + | |||
| + | |||
| + | |||
| + | |||
| + | |||
| + | |||
| + | |||
| + | |||
| + | |||
| + | |||
| + | |||
| + | |||
| + | |||
| − | |||
| − | |||
| − | [[File: | + | ==Step 10== |
| + | [[File:Mach10.png|right]] | ||
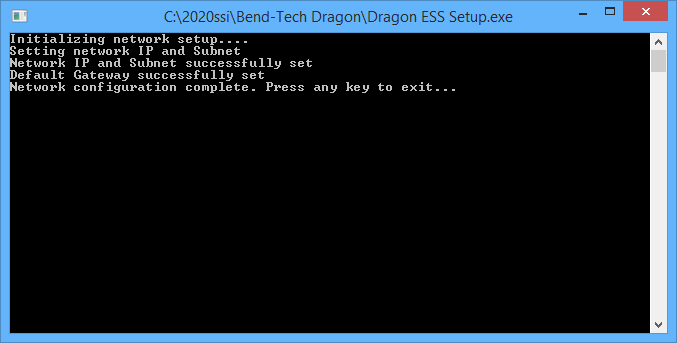
| + | * The Dragon ESS Install window will appear. Press any key on your keyboard to continue. | ||
Latest revision as of 07:46, 11 February 2016
"Mach 3 and the Ethernet Smooth Stepper (ESS) are necessary installs for users who operate our Bend-Tech Dragon software along with our Dragon Machine."
"Carefully look through the steps below to complete these important installations."
Contents
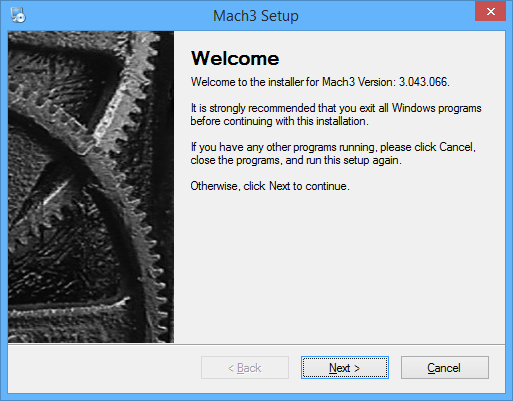
Step 1
- Close all running programs and click the NEXT button.
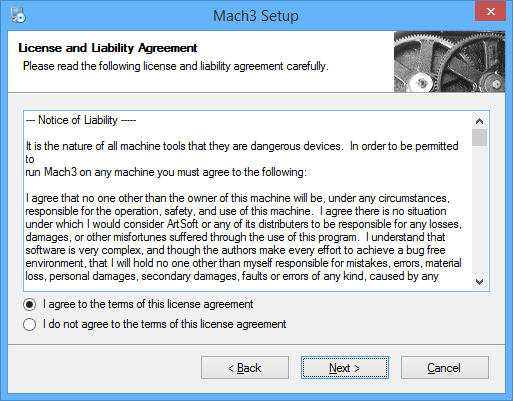
Step 2
- Select the option to "agree to the terms of this license agreement" and click the NEXT button.
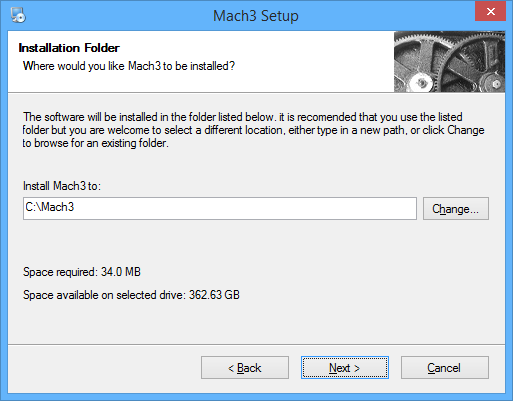
Step 3
- Leave the file location folder as it is and click the NEXT button.
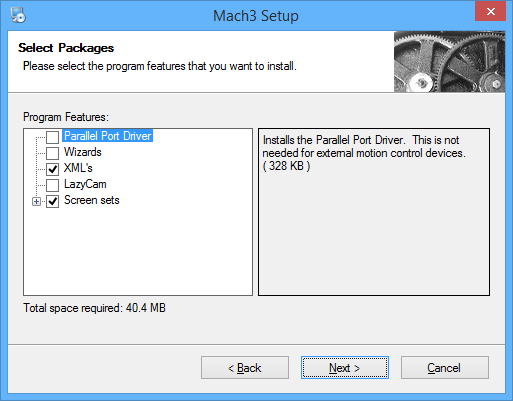
Step 4
- Uncheck the Parallel Port Driver, Wizards, and LazyCam checkboxes and click the NEXT button.
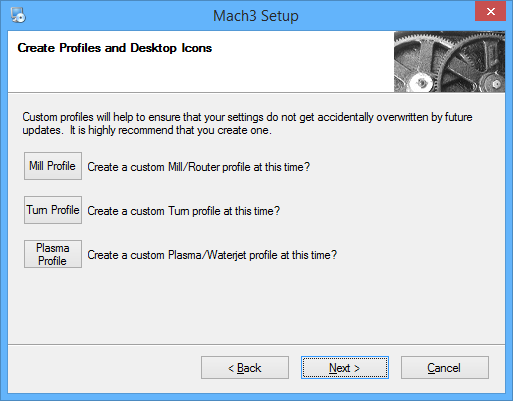
Step 5
- Since we are sending users a specified Dragon profile, simply click the NEXT button.
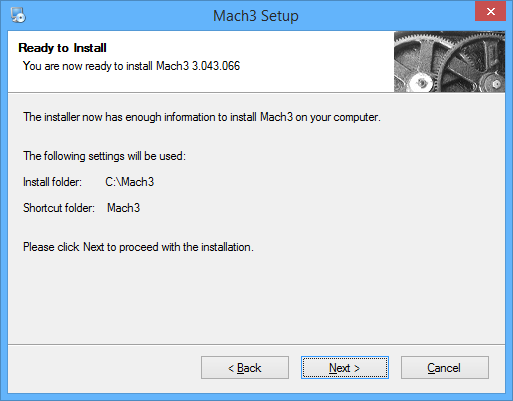
Step 6
- Click the NEXT button.
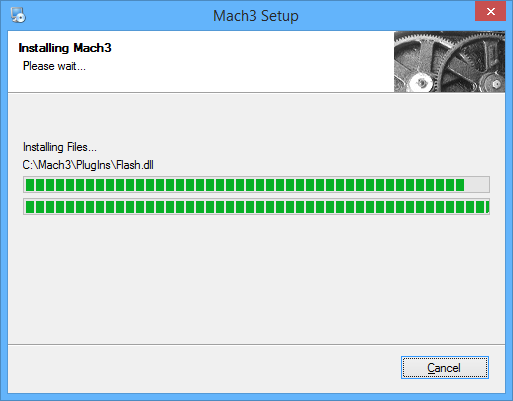
Step 7
- Wait for the program to install completely.
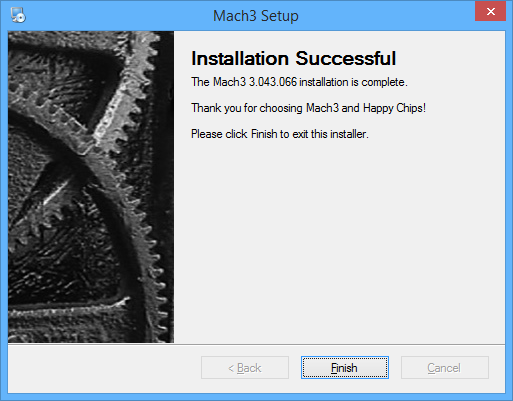
Step 8
- Click the FINISH button.
Step 9
- The Select Network Adapter window will appear.
- Select your ethernet adapter from the list (There is a very high probability that this is going to be the Realtek PCIe GBE Family Adapter).
- If you are unsure about your particular adapter, contact us at our office 651-257-8715 and we will help you determine this.
Step 10
- The Dragon ESS Install window will appear. Press any key on your keyboard to continue.
