Custom Part Tutorial
Custom Part
This tutorial will walk you through how to start and create a part using the custom part interface.
- To begin, click the New Part icon at the top of the window or select File --> New --> Tube. Doing so will bring
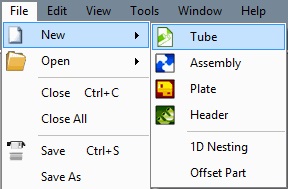 up the "New Design Menu". This menu will also appear automatically when Bend-Tech starts up.

- In the "New Design" menu, select the "Custom Part" option under "Create New Design".

This will open up a new Custom Part Design interface. In this new window, a die and material must be selected before the part can be designed. In the Die & Material tab, click the drop down menu under Select Material and choose a material from the list. Click the drop down menu below Select Die and choose a die from the list.

Note: If a default die and material have already been set up, they will already be selected. In that case proceed to the next step.
Once a proper die and material have been selected, the custom part design panel will be available to edit. First, the number of bends needs to be chosen. Click the drop down menu below Number of Bends and select 4 from the list.

Make sure the box next to Refresh on Keystroke is checked. While this option is enabled, the part display and results table will update automatically as the coordinates are being entered.
In the coordinate fields, enter the values that are shown below. Make sure each bend's Dim Type is set to Apex. If not, click the drop down menu and select Apex from the list.

Once these values have been entered, the window should look similar to the image below. The part is now complete. The results table for the complete part is shown in the top right corner.

