Custom 3D Tutorial
This tutorial will walk you through the process of creating a part using the Custom 3D Part design interface.
Start Up
1) Start by double clicking the "Bend-Tech 7x" icon to start up the program.![]()
OR
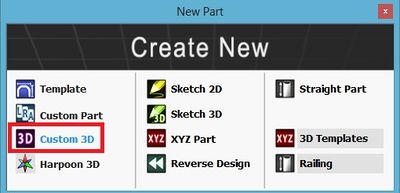
3) Select the New Part icon at the top of the window or select File --> New --> Tube. Doing so will bring up the "New Design Menu". This menu will also appear automatically when Bend-Tech starts up.
- In the "New Design" menu, select the "Custom 3D Part" option under "Create New Design".
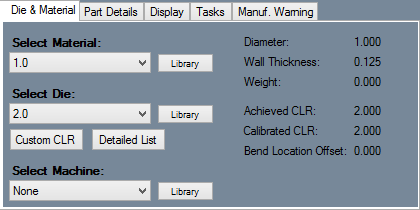
4) For the purposes of this tutorial. The "Die & Material" tab is located in the upper left corner of the window. Select the "1.00 Material" and "2.0 Die" as seen here.
Note: If a default die and material have already been set up, they will already be selected. In that case proceed to the next step.
Creating the Part
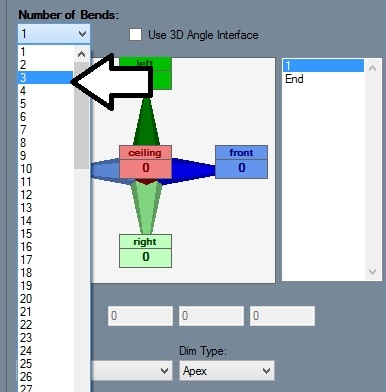
1. Once a die and material have been chosen, the input interface panel will be available to edit. First, the part's number of bends needs to be selected. Select the drop down menu below "Number of Bends" and choose "3" from the list.
Each bend has 6 directional coordinate fields, but only up to 3 can be entered for one bend and conflicting directions cannot be used at the same time. For example, values cannot be entered into both floor and ceiling for a single bend. Each bend also has a Dim Type and Die drop menu which can be used to change a single die's dimension type or die.
Make sure the box next to Refresh on Keystroke is checked. While this option is enabled, the part display will update automatically as the coordinates are being entered.
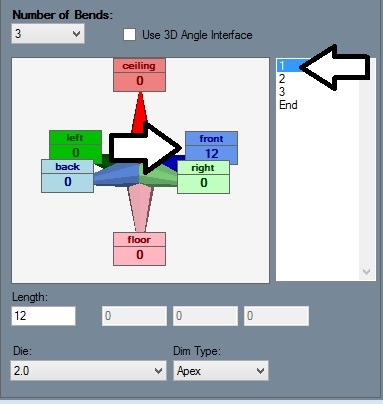
Select 1 from the bend list to the right of the coordinate fields. In the coordinate field area, enter 12 into the to front field as shown below.
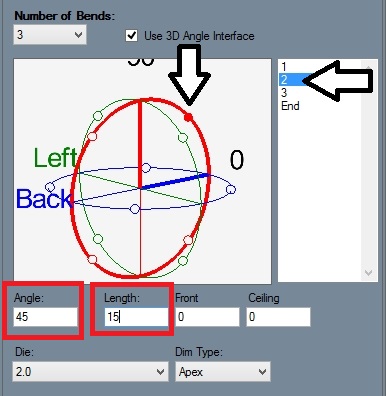
Next, select 2 from the bend list. Check the box next to Use 3D Angle Interface. This will enable the 3D interface for the second bend only. Click the Ceiling-Front point on the Tri-Globe as shown below. Enter 45 into the Angle field and 15 into the Length field.
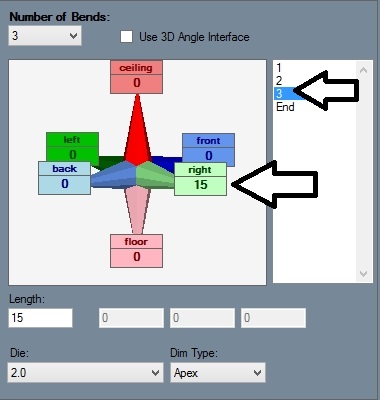
Select 3 from the bend list and enter 15 into the to right field as shown below.
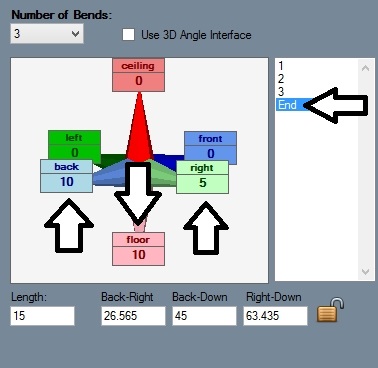
Select End in the bend list and enter 10 into the back field, 10 into the floor field, and 5 into the right field.
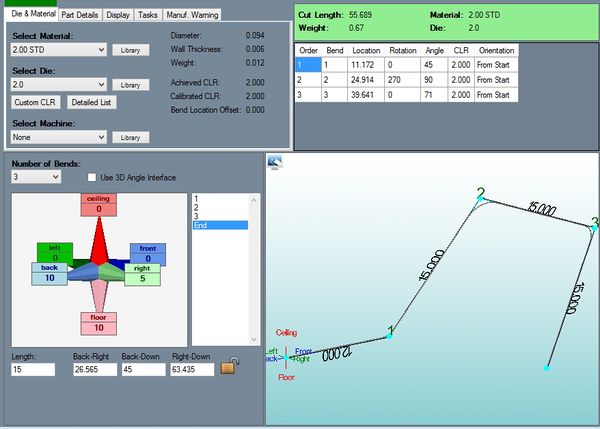
Once all the coordinates have been entered, the part is complete and the window should look similar to the image below. The results table for the complete part is shown in the top right corner.
